Creative Image Merging: Design Tips & Tricks
By Tu Luu · · · 9 min read
Learn how to combine multiple images and text layers into stunning compositions using our online Image Merger. Perfect for creating collages, social media graphics, and professional marketing materials.
What is Image Merging?
Merging images is compositing: stacking several source rasters, plus any text layers, into one output image. Every layer has a position, a size, a rotation and a stacking order, and the final PNG is what you get when the renderer draws them in that order onto a fixed canvas.
Two consequences follow from that, and they explain most of the problems people hit. First, the canvas size is decided before you start, not after — enlarging it later rescales everything. Second, output quality is bounded by the smallest source: a 400px-wide photo scaled up to fill a 1920px canvas will be soft no matter what the canvas resolution says.
The Image Merger here runs on the browser's Canvas API, so the compositing happens on your own machine and no file is uploaded. That also means performance is bound by your device — see the note on layer counts below.
Key Features of Our Image Merger
Before diving into the tutorial, let's explore the powerful features at your disposal:
Multi-Layer Support
Add up to 10 image and text layers with independent controls for each
Drag & Drop Interface
Intuitively position elements by dragging them around the canvas
Transform Controls
Resize, rotate, crop, and flip any layer with precision handles
Text Layers
Add customizable text with fonts, colors, and background options
Canvas Presets
Quick-select popular sizes for Instagram, Facebook, and more
Undo/Redo History
Experiment freely with full support for Ctrl+Z and Ctrl+Y
Step-by-Step Tutorial
Let's walk through creating a professional image composition from start to finish:
Step 1: Set Your Canvas Size
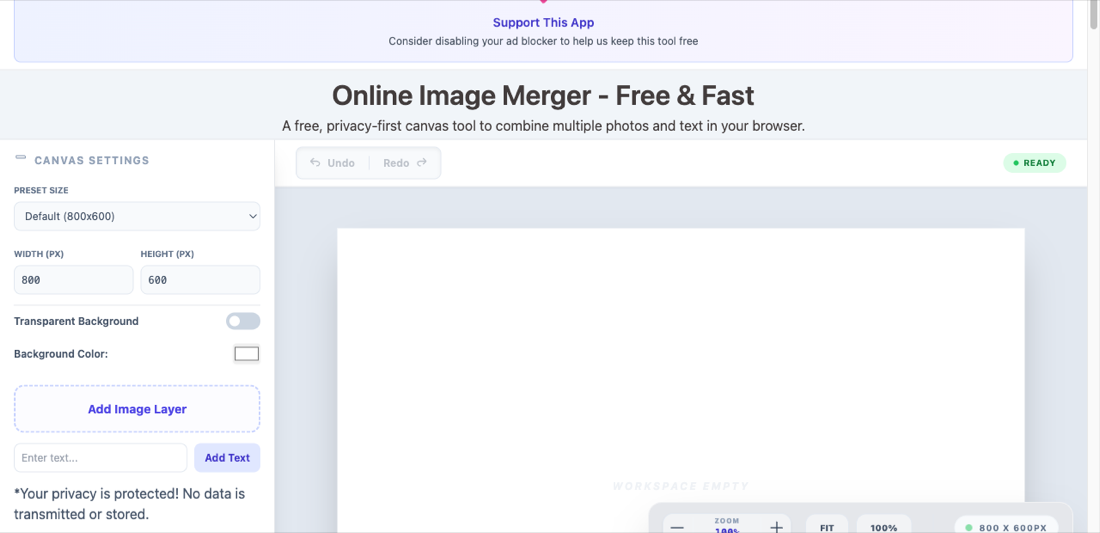
Start by choosing your canvas dimensions in the left panel. Select from presets like Instagram (1:1), Facebook Post (1200x630), or Full HD (16:9), or enter custom dimensions. Choose whether you want a solid color background or transparent canvas.
Step 2: Add Image Layers
Click "Add Image Layer" and select your images. Our smart grid automatically arranges uploaded images on the canvas. You can upload multiple images at once, up to 10 layers total.
Step 3: Position and Arrange
Click any layer to select it, then drag to reposition. Use the corner handle to resize while maintaining aspect ratio. The rotation handle at the top allows free rotation. Use the layer panel to change stacking order—bring layers forward or send them backward.
Step 4: Crop and Transform
For image layers, click the crop icon to enter crop mode. Drag the edge handles to trim unwanted areas. Use the Flip Horizontal button to mirror images when needed.
Step 5: Add Text Layers
Type your text and click "Add Text" to create a new text layer. With the text layer selected, customize font size, color, background, and bold styling in the properties panel.
Step 6: Add Borders (Optional)
Select any layer and adjust the Border Size slider to add a colored border. Use the color picker to choose your border color. Borders work great for creating photo frames or highlighting text.
Step 7: Export Your Creation
When satisfied with your design, click "Export PNG" to download your merged image. The export includes all layers flattened into a single high-quality PNG file.
Design Tips for Stunning Compositions
Use the Rule of Thirds
Divide your canvas mentally into a 3x3 grid. Place key elements along these lines or at their intersections for visually balanced compositions. This classic design principle creates more dynamic and interesting layouts than centering everything.
Create Visual Hierarchy
Not all elements should compete for attention equally. Establish a clear hierarchy by:
- Size variation: Make important elements larger
- Color contrast: Use bold colors for key elements
- Positioning: Place primary content in prominent areas
- White space: Give important elements room to breathe
Maintain Consistent Styling
For professional-looking results, keep styling consistent across elements:
- Use a limited color palette (2-4 colors work best)
- Apply similar border widths to multiple elements
- Align elements to create clean lines
- Use consistent spacing between elements
Leverage Overlapping
Don't be afraid to overlap images. Strategic overlapping creates depth and connection between elements. Use the layer ordering controls to determine which images appear in front. Partially overlapping images feel more dynamic than rigidly separated ones.
Popular Use Cases
Social Media Collages
Create engaging multi-photo posts for Instagram, Facebook, or Pinterest. Combine your best shots into a single image that tells a story. Use our preset sizes optimized for each platform to ensure your collages display perfectly without cropping.
Product Showcases
E-commerce sellers can combine multiple product photos into attractive showcase images. Show different angles, colors, or sizes in a single image. Add text layers for pricing, features, or promotional messages.
Event Announcements
Create eye-catching event graphics by combining photos with text overlays. Include the event name, date, time, and location all in one shareable image. Perfect for parties, concerts, sales, or business events.
Before and After Comparisons
Side-by-side comparisons are powerful for fitness journeys, home renovations, editing tutorials, and more. Align two images on your canvas with equal sizing for clear, impactful comparisons.
Meme Creation
Combine images with bold text layers to create memes and shareable content. Our text layer controls let you add bold, colorful text in any size and position. Export and share your creations instantly.
Photo Montages
Compile memories from events, trips, or special occasions into artistic montages. Arrange photos of varying sizes, add decorative elements with borders, and create keepsake images worth printing or framing.
Keyboard Shortcuts
Speed up your workflow with these keyboard shortcuts:
- Ctrl/Cmd + Z: Undo last action
- Ctrl/Cmd + Y or Ctrl/Cmd + Shift + Z: Redo
Privacy First
Like all our tools, the Image Merger processes everything locally in your browser. Your images are never uploaded to our servers. This means:
- Complete privacy for personal and sensitive photos
- Faster processing with no upload/download delays
- Works offline once the page is loaded
- Safe for business and commercial use
Tips for Best Results
Use High-Quality Source Images
Start with the highest resolution images available. Upscaling low-quality images will result in pixelation. If an image looks blurry when resized larger on the canvas, use a smaller size or find a better source.
Mind the Pixel Budget
Editor performance is bound by total pixel volume across all layers, not by layer count on its own. Ten layers at 1920×1080 is about 20 megapixels per redraw and stays responsive on a typical laptop. Ten layers straight off a 4K camera is roughly 83 megapixels — four times the work for an output you are probably exporting at 1080×1080 anyway.
So the rule is not "use fewer layers", it is downscale before you add. Resize sources to no more than the canvas dimension you will export at; the extra pixels cannot appear in the output and only cost you frame rate. Beyond roughly 5000px per side you may also hit the browser's own canvas limits, which vary by device and are documented in the MDN canvas size notes.
Preview Before Export
Use the zoom controls to preview your design at different sizes. What looks good zoomed out might reveal issues when viewed at 100%. Check text readability and image quality before final export.
Start Creating Now
Ready to merge your images into something amazing? Head to our Image Merger Tool and start creating. No account required, completely free, and all processing stays private on your device.